Thursday, December 19, 2013

Easy Peasy Santa Plates

Since our special Santa Plate met an untimely end last year the girls wanted to make another one for Santa's cookies and treats to go on this year.
Today we got out some paper plates and made some fun, easy and food safe Santa Plates for the man in red and his reindeer as well. 
They turned out very cute, I'd love to make a collection of these and add to it every year.

WE USED:

* paper plates
* food colouring
* small clean paintbrushes
* water
* cloth

Since there will be food going on these plates we are using food colouring to paint with instead of actual paint.

 I set out our food colouring inside jar lids so it was easy to access.

The girls really enjoyed making these for Santa, we ended up with four of them! Enough for Mrs Claus, the elves and reindeer too.


Bubble created one with a Christmas tree and another with a star.


Squeak painted the reindeer on hers :)

Wednesday, December 18, 2013

Biscuit Houses

Bubble has been begging and begging to make a gingerbread house this Christmas. The thing is I feel like I’ve been baking day and night since the start of December and I still have plenty more to do before the ‘big day’, so the thought of baking gingerbread that won’t get eaten wasn’t really appealing.
I didn’t want the girls to miss out on the experience though so we picked up some biscuits from the shops during our last grocery run and today I set them out with bowls of treats to use for decorations and thick icing.
They had a blast getting messy and creating some sticky little biscuit houses.
 

WE USED:  
* biscuits
(we used Arnotts Nice biscuits but any kind will work, they are just the only shop bought ones our girls will eat!)
* icing
(I just used pure icing sugar and made the mix as thick as possible)
* things to decorate
(we used Smarties, chocolate dots and naturally coloured sprinkles)

I put out a chopping mat for each of the girls as well as biscuits, icing and decorations.


Squeak (4) needed a bit of help to get her icing on her biscuits but found it easy to stick them together herself.

Bubble (6) was able to do it all by herself, she was very proud :) 
The girls then got busy icing and decorating their houses however they liked.
A few Smarties may have been taste tested in the process.
OK, a lot :)

It was super hot here today (41'c max, hello Summer) so we needed to prop our houses up on each side while they dried or else they kept toppling over!

The girls experimented with different techniques for putting on their decorations; applying icing to the houses and adding them, putting icing on the decorations themselves and then sticking to the house, drizzling icing over the top and using knives and spoons.

Squeak's house under construction.

Bubble's house getting some roof work done.

Squeak's yummy looking Biscuit House.

Bubble's finished Biscuit House looked adorable.
Great work girls!

Monday, December 16, 2013

Cutting Skills - Play Dough Christmas Shapes

Squeak's fine motor development has been our big focus these last few weeks and since she is very keen on doing Christmas themed activities at the moment a lot of our skill building has revolved around that.
Today we used play dough, some Christmas cutters and scissors to get in some more fine motor exercise.

WE USED:

* play dough
(I made normal play dough then thickened it using extra flour so it would be easier to hold and cut)
* cookie cutters
* child sized scissors

The girls chose some Christmas shaped cutters from the play dough box and I made some especially thick play dough for this activity by adding extra flour to our mix.

First we rolled the dough flat.

Then we used our cookie cutters upside down so they just made an imprint instead of cutting all of the way through.

The imprint on the play dough gave the girls a template to cut around.

Then the girls got to work with their scissors cutting out their Christmas shapes.
Because of the extra thick dough it was easy to handle and also cut.

While little Squeak used play dough scissors Bubble used ordinary scissors.

Ordinarily cutting is an activity Squeak avoids like the plague. Everything about it frustrates her as her joints fatigue and get painful and she lacks very fine motor control. This activity was different though, the sensory nature of the play dough and also the novelty of cutting dough rather than paper kept her interested for over half an hour.

The girls ended up making lots of different Christmas shapes.

Well done Squeak, keep practicing x


Saturday, December 14, 2013

Building Block Presents - Fine Motor Activity

Little Squeak needs a lot of fine motor practice to build the muscles in her hands and develop her pincer grip for writing and using scissors. Her joints fatigue easily so we try and do short fine motor building activities several times a day to build up these skills.
This activity was one the girls really enjoyed and gave Squeak a fine motor work out without her even noticing.

WE USED:
* wooden building blocks
* mini adhesive gift bows

Both Bubble and Squeak love playing with their dolls endlessly on the weekends, so I suggested we use our building blocks to make them some Christmas presents.
We chose some present shaped blocks and I put out a bowl of mini adhesive bows to decorate them with.

Squeak removing backing paper from the bows to put them on top of her present.
This is a great fine motor activity, especially regarding pincer grip which is something she really struggles with.

One building block present for one lucky doll.

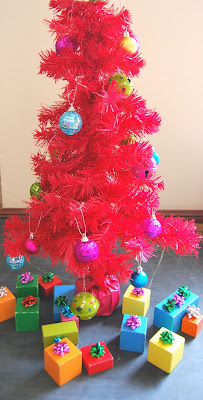
The girls ended up with a stack of these under their miniature pink Christmas tree.

There was plenty of imaginary play going on while they made their presents.
The girls chatted away describing what was in each one:
"Oh look! This one is a book about Ancient Egypt. It has shiny stickers inside"
"This one is a baby doll that also has a teddy bear and a real nappy"

My favourite kind of activity.
The kind where we develop skills while we have fun :)

Sunday, December 8, 2013

Teacher Gifts - Quote Baubles

 At this time of year we have a LOT of wonderful people to thank.
The girls occupational therapist, speech therapist, early intervention teachers, preschool teachers, school teachers and all the various support people who have helped them achieve this year. We are so grateful to every single one of them.
Trying to come up with a gift that is meaningful, personal, practical and economical when it is multiplied by 20 can be a challenge though.
This year I decided to make something similar to our Letter To Santa ornament that we made years ago, only this time using quotes that my children have said about each person.
The end result is very cute, we'll be packaging them up with something yummy and hopefully they will make these very important people smile each Christmas when they put up their tree.

WE USED: 
* clear baubles
(for this project we used small glass baubles from Spotlight, they were $8 for a pack of 9)
* paper
* scissors
* skewer

The baubles we used were from Spotlight, $8 for a pack of 9.
These are glass but they have plenty of plastic options too in many different Christmas shapes.

We carefully removed the tops of each bauble being careful not to damage the metal prongs that hold them in place.

Then I sat down with the girls and they told me a little bit about why they like each person on our support list.
Then we printed them out and cut them out with scissors. I made the quote circles roughly the same diameter as the baubles so they would fit inside nicely.

Once our quotes were cut out it was very simple to roll them up and pop them inside a bauble. I used a skewer to reshape them once they were inside so they weren't all curled up then reinserted the prongs from the tops of the baubles so the paper was in between and held in place.

I adore the way they turned out, the things the girls said about each person were hilarious and also showed how very important they are to us. 
Hopefully they all remember how wonderful they are every time they look at their Christmas Tree!

Friday, December 6, 2013

Teacher Christmas Gift - Simple Bead Jewellery

We bought some little gifts for the girls teachers this year but also wanted to include something they had made themselves. Beaded jewellery is perfect for this - both our girls were able to make necklaces and bracelets on their own without assistance and chose the beads themselves as well.
I love them so much I'm going to ask them to make me some for Christmas too!

 WE USED:

* beads
(ours were from Spotlight for $5 a bag, one bag made all of these pictures below and still enough left over for another one)
* threading elastic
* small gift boxes
(ours were from Hot Dollar, $2 for a pack of 6)

Bubble's bracelet for her very special teacher.

Bubble's necklace for her teacher.

Squeak made a necklace for her much loved teacher too.

Christmas Class Gift - Build A Snowman Kit

Bubble has a smaller class size to Squeak, only 16 kids, and since they are older we wanted to make them a gift that was a little bit more messy and hands on!
Both of our girls love play dough and it is also cost effective to make in bulk, so we decided on some Play Dough Snowman Kits as class gifts.
We already had all the supplies we needed to make these kits apart from the black beads, so all up it cost us only $2! Even buying the supplies from scratch though they would cost around $10 for 20.

WE USED:

* home made play dough
(we used this recipe without the glycerine or food colouring)
* black beads
(we bought ours from Spotlight for $2)
* orange pipe cleaners
(we needed 2 pipe cleaners for 20 kits)
* small twigs
(we collected ours during school pick up time!)
* small buttons
* red felt to make scarves
(one large sheet was plenty for ours)
* plastic tubs or bags for storage
(we used plastic tubs we already had that were $2/pack of 8 at Hot Dollar, you could easily use Ziplock bags instead though)
* Kit labels printed onto sticker paper
(labels are included below as a printable)


The contents of our Snowman Kits.
We put in three balls of play dough and a 'snowman building kit' containing:
* two small twigs for arms
* 3 small buttons
* small piece of orange pipe cleaner as a carrot nose
* 10 black beads for eyes and mouth
*felt scarf


Kits as they were packaged up with a mini chocolate Santa included.
We put the Merry Christmas Label on the top of our tubs and the kit contents label on the little bag containing the loose parts inside the tub.


The tubs worked really well for transport and storage but ziplock bags would work just as well and be more cost effective.
We printed our labels onto sticker sheets and cut them out, you could also just print them onto normal paper though and glue them to your containers instead.


A play dough snowman our girls made with one of the kits.

Build A Snowman Kit Labels in 6x4 photo size:
(right click to open and save in separate tab)


Build A Snowman Kit labels in A4 paper size:
(right click to open and save in separate tab)